Remote Control Disassembly
Remote Control Disassembly
Save the screws aside in labeled bags so you know what part of the remote they were from.
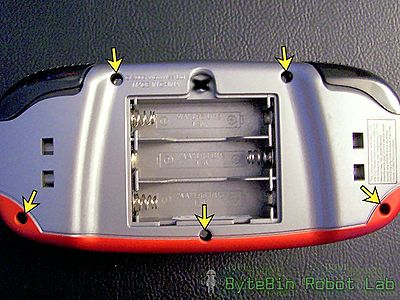
1. Start by removing the 5 screws holding the remote together on the bottom. Disregard the area marked with the black X as that is the screw that held the battery plate on.
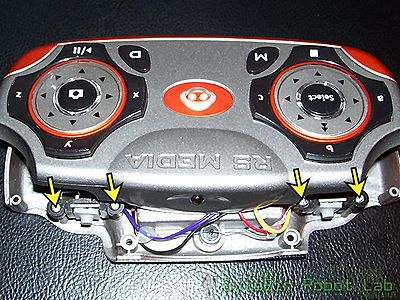
2. Unscrew the 4 screws holding the two shift switches together. Note which side the purple and yellow wire sets belong.
3. If you want to remove the back plate completely, you'll need to desolder the positive and negative battery wires as shown in the arrows.
4. Remove the screws circled in purple. These hold the circuit board to the front plate. Be very careful removing the board, noting the IR LED at the very top. Also note that the navigation plates are loose. They are supposed to be that way, even when assembled. Remove the screws circled in red first, then the ones in blue. This disassembles the navigation plate.
Note the different sizes of screws used. As always, put in bags with labels. The tiny screws are for the circuit board and navigation plate spacers, while the longer ones are for the navigation plates. The thicker longer ones hold the front and back of the remote together.
5. Remove the two small screws holding the shift light/logo assembly.


